A stylishly purple way to protect your favourite pen
Jump: Pattern – Galleria
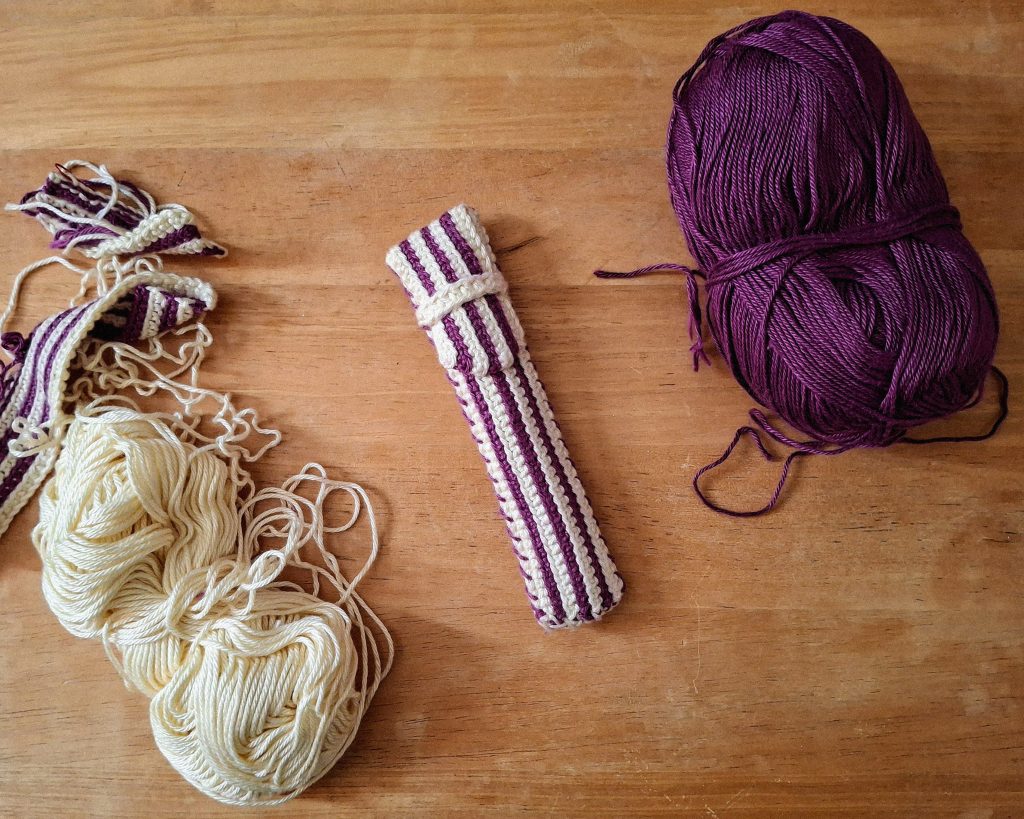
Ube at Krema (ube and cream). A pen case designed for the journalling and stationery-obsessed divas! Inspired by the Philippines’ most beloved purple yam, ube (oo-beh); it’s a quick project that holds your favourite pen, lip gloss, and little essentials you cherish.
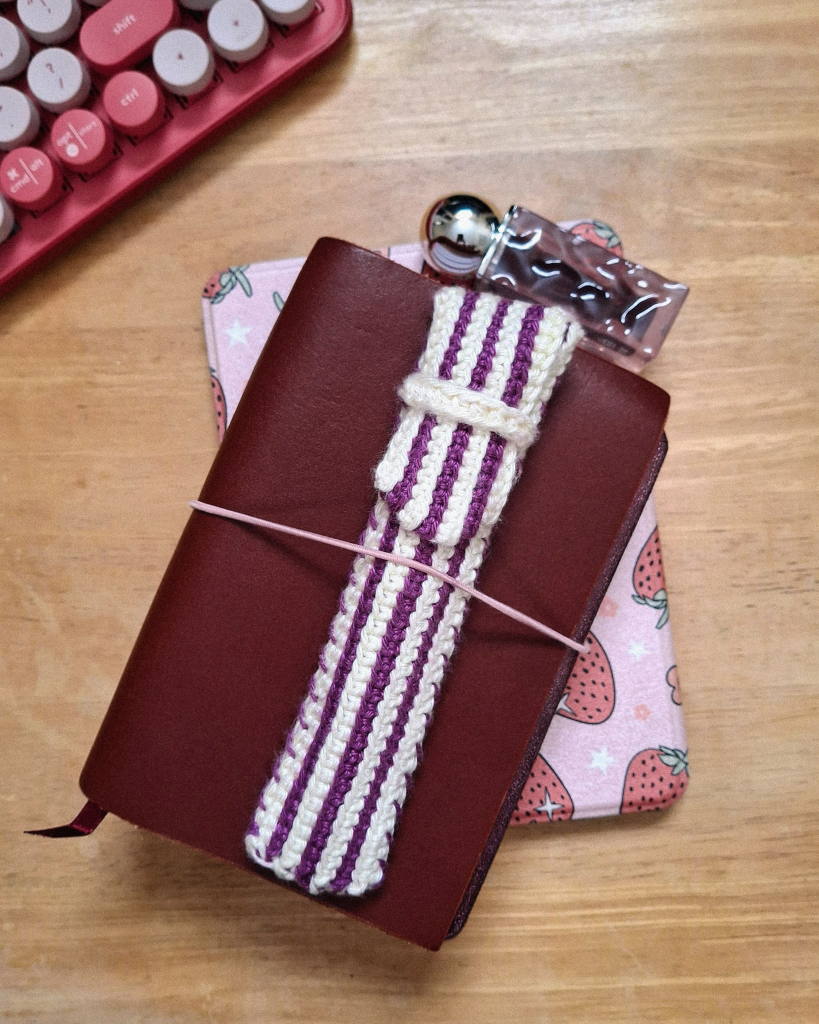
For more crochet patterns: click here
Etsy Shop: click here for couture crochet pieces
Instagram: @airrasamson
Threads: @airrasamson
Pattern
Jump: Body – Flap – Strap – Sewing
| Yarn characteristics | DK weight, (mercerised) cotton |
| Yarn amount (<=50 g balls) | 1x white, 1x purple |
| Hook size (mm) | 2.5 |
| Tension (sts/10 cm) | 26 |
| Standard case length, width (cm) | 15.4, 3.4 |
| Small case length, width (cm) | 11.5, 3.4 |
UK Terminology
Note: W = white, P = purple, FLO = ‘front loop only’
Tip: Use a bigger hook (~3.0 mm) if slip-stitches are too tight
Sizing note: Pattern is designed to fit most standard sized pens such as Lamy Safari and TWSBI Eco. Smaller pens, like Kaweco Sport, are recommended small sizing.
Allow yourself to adapt the pattern to your preferred size, whether that is length or width. Refer tension into changing the length, add or reduce number of stripes for width.
- Adapting foundation chain to your desired length is (2.6 x length of pen in cm), always round up for chain number. Then add 1 chain to start stitches.
- Flap sizing is always body’s foundation chain plus 15 chains (this is the flap), then plus 1 chain for starting stitches.
Body
Fd ch 40 + 1 with W (for smaller size, fd ch 30 + 1.)
ROW 1: Dc into 2nd back bump of chain, dc into back bumps across chain – colour change to P with final stitch, turn.
ROW 2: Ch 1, ss into first st FLO, then ss FLO across row, turn.
ROW 3: Ch 1, for first st *dc with hook under colour W st and through P ss located behind, repeat * across row before final st. Normally dc into final st – colour change to W. Turn.
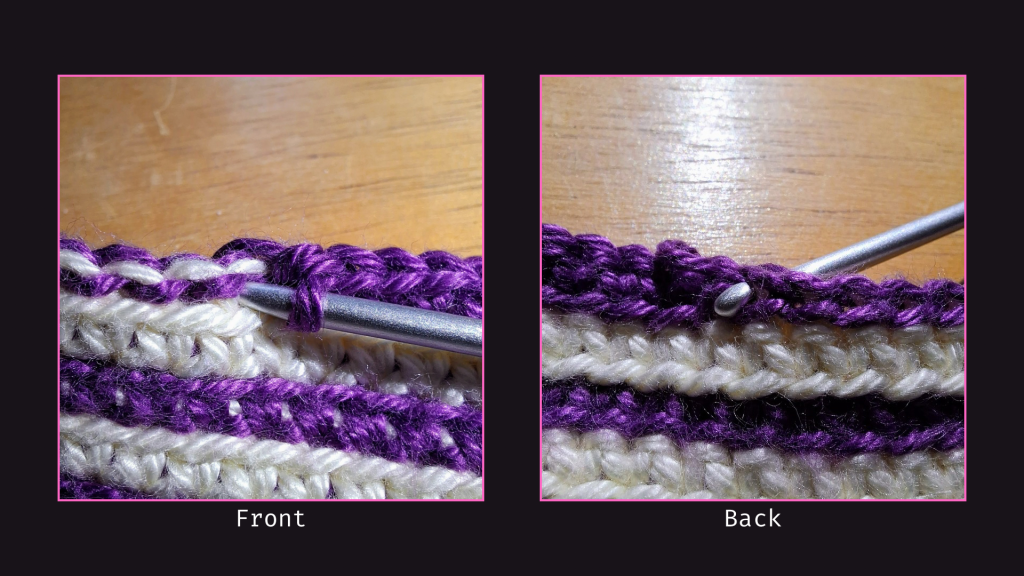
ROW 4: Repeat Row 2.
ROW 5: Ch 1, for first st *dc with hook under colour P st and through W ss located behind, repeat * across row before final st. Normally dc into final st – colour change to P. Turn.
ROW 6-13: Repeat Row 2-5 (without colour change at the end of final row). The final colour should end with W.
Cut yarns.
Flap
Note for Row 3, Row 5: For an increase, make sure to dc each into the two slips-stitches using the shared first stitch of the row.
Fd ch 55 + 1 with W (for smaller size, fd ch 35 + 1)
ROW 1: Dc into 2nd back bump of chain, dc into back bump across chain – colour change to P with final stitch, turn.
ROW 2: Ch 1, 2 ss into first st FLO, then ss FLO across row, turn.
ROW 3: Ch 1, into first st *dc with hook under colour W st and through P ss located behind, repeat * across row before final st. Normally dc into final st – colour change to W. Turn.
ROW 4: Repeat Row 2.
ROW 5: Ch 1, into first st *dc with hook under colour P st and through W ss located behind, repeat * across row – colour change to P. Turn.
ROW 6: Ch 1, ss into first st FLO, then ss FLO across row, turn.
ROW 7: Ch 1, for first st *dc with hook under colour W st and through P ss located behind, repeat * across row before final st. Normally dc into final st – colour change to W. Turn.
ROW 8: Repeat Row 6.
ROW 9: Ch 1, for first two sts dc2tog with hook under colour P st and through W ss. For the next st *dc under colour P st and through W ss located behind, repeat * across row before final st. Normally dc into final st – colour change to P. Turn.
ROW 10: Repeat Row 6.
ROW 11: Ch 1, for first two sts dc2tog with hook under colour W st and through P ss. For the next st *dc under colour W st and through P ss located behind, repeat * across row before final st. Normally dc into final st – colour change to W. Turn.
ROW 12-13: Repeat Row 8-9 until final row (without colour change at the end of final row).
Cut yarns.
Sewing
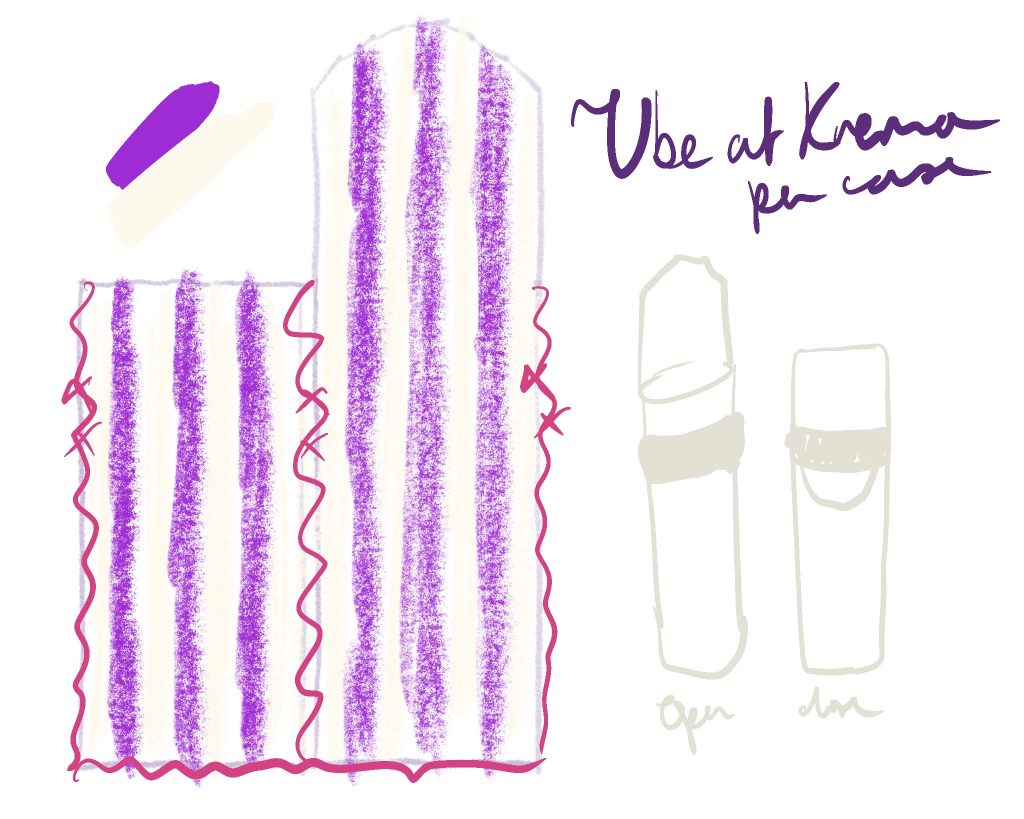
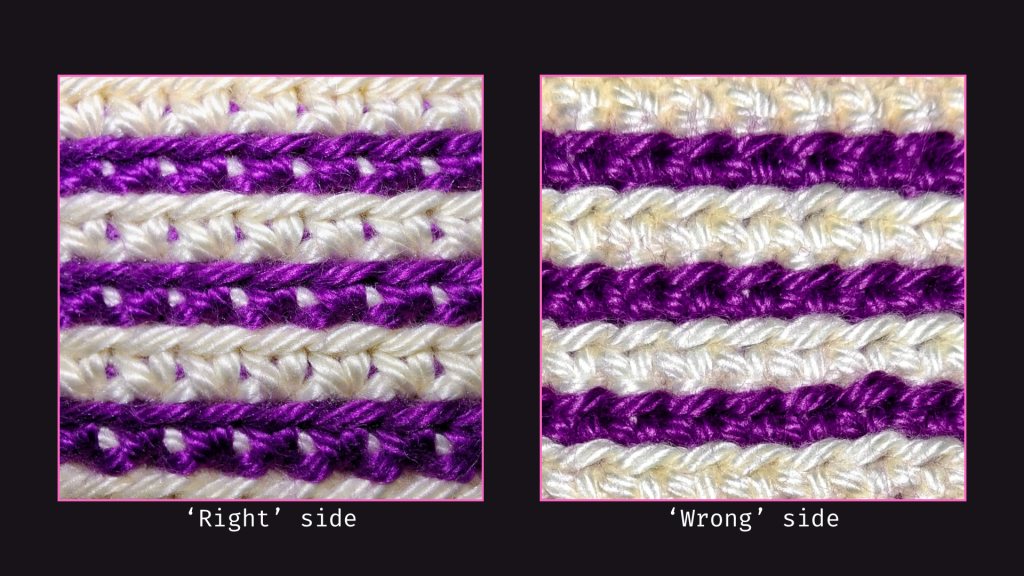
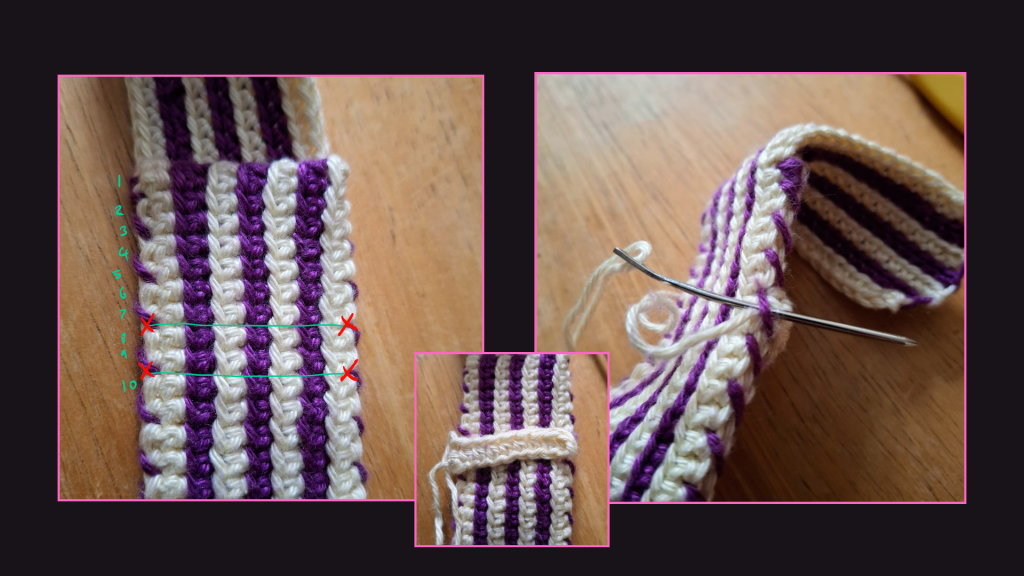
Begin by aligning body and flap pieces with the ‘wrong’ side, and the bottom part of the case (which has the loose yarn) together. Keep in mind the ‘wrong’ side will be the outside of the case as the stitches are neater. Feel free to weave in the loose yarn.
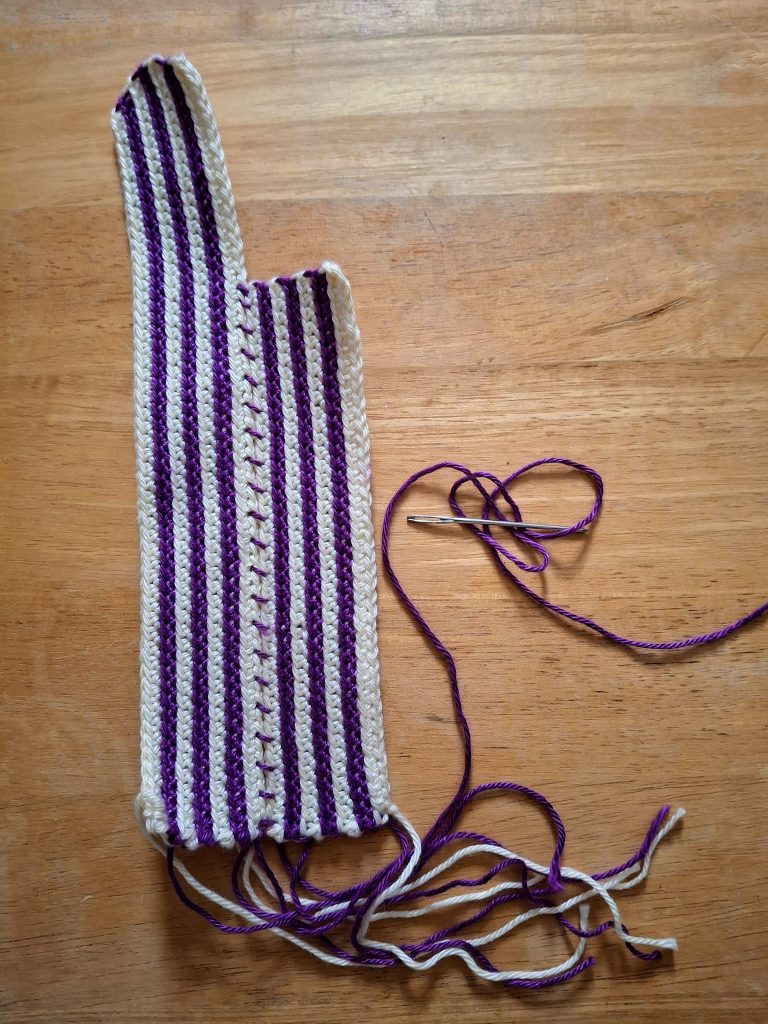
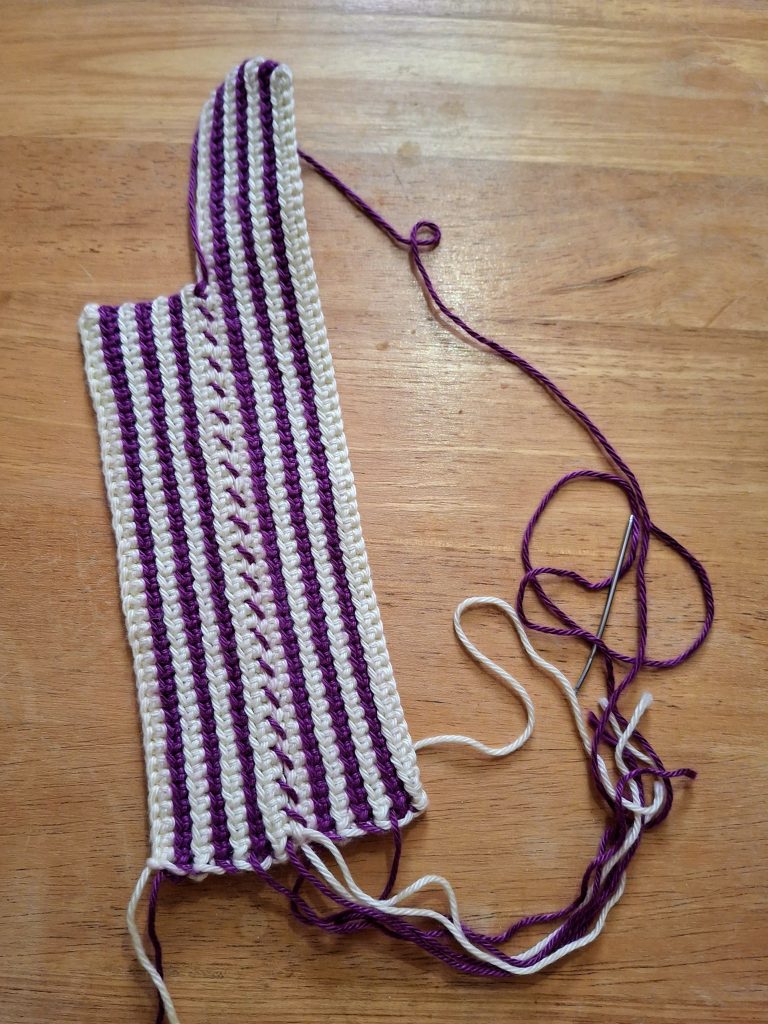
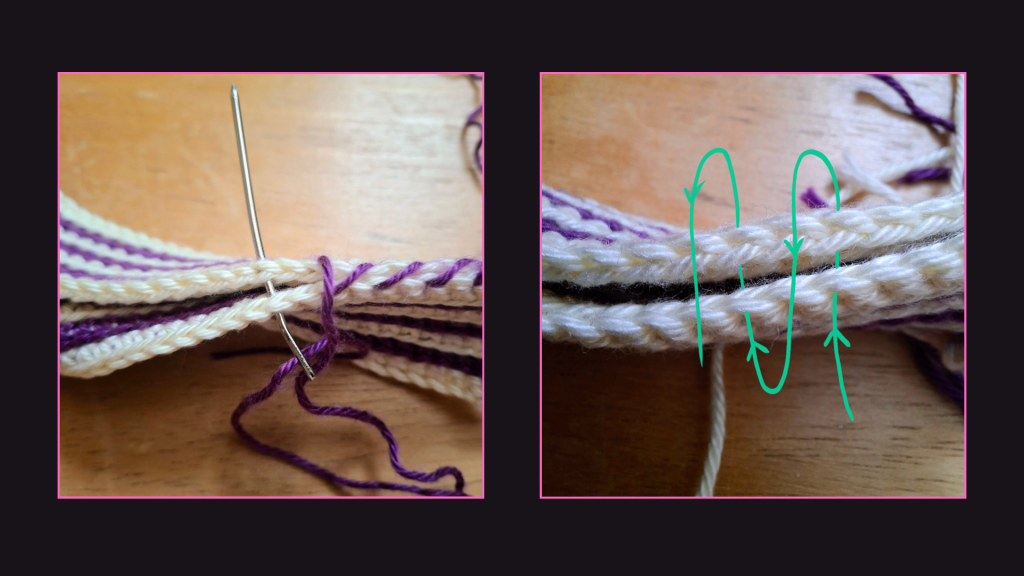
By holding the case with the WS facing out, sew the sides with purple yarn starting from the bottom. Repeat by sewing a pair of stitches, then skipping the next pair – this creates a diagonal look. Follow the photo for the sewing pattern.
Once the sides are finished, sew the bottom with white yarn into every pair of stitches.
Strap
Fd ch 10 with W.
ROW 1: Htr into 2nd back bump of the chain, htr into back bumps across the chain.
Cut a generous yarn tail so it can be sewn into the case.
Guide one of the yarn tails to the other side with a needle. Now you have one yarn tail in each side for sewing.
Sew strap from start of 8th row, and start of 10th row.
Voila! Your pen case is ready to hold your secrets.
Galleria
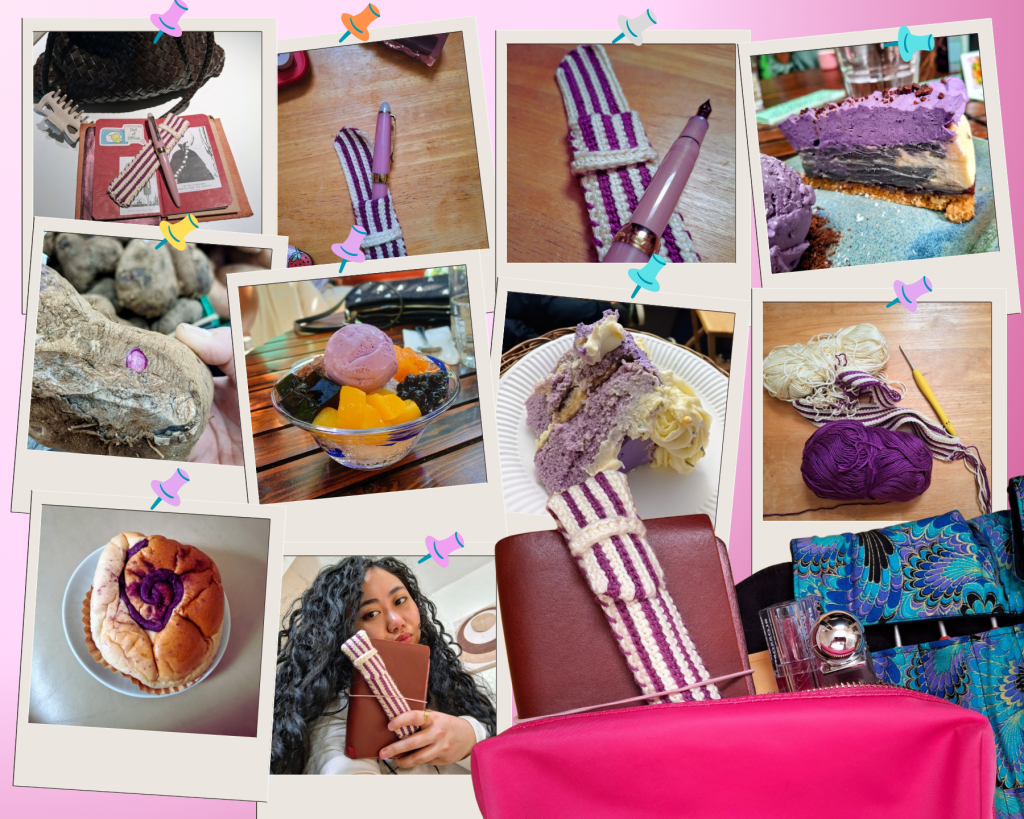
Support your local Filipino-owned businesses if you’d like to try ube!
For more crochet patterns: click here
Etsy Shop: click here for couture crochet pieces
Instagram: @airrasamson
Threads: @airrasamson
Thank you, until next time!
